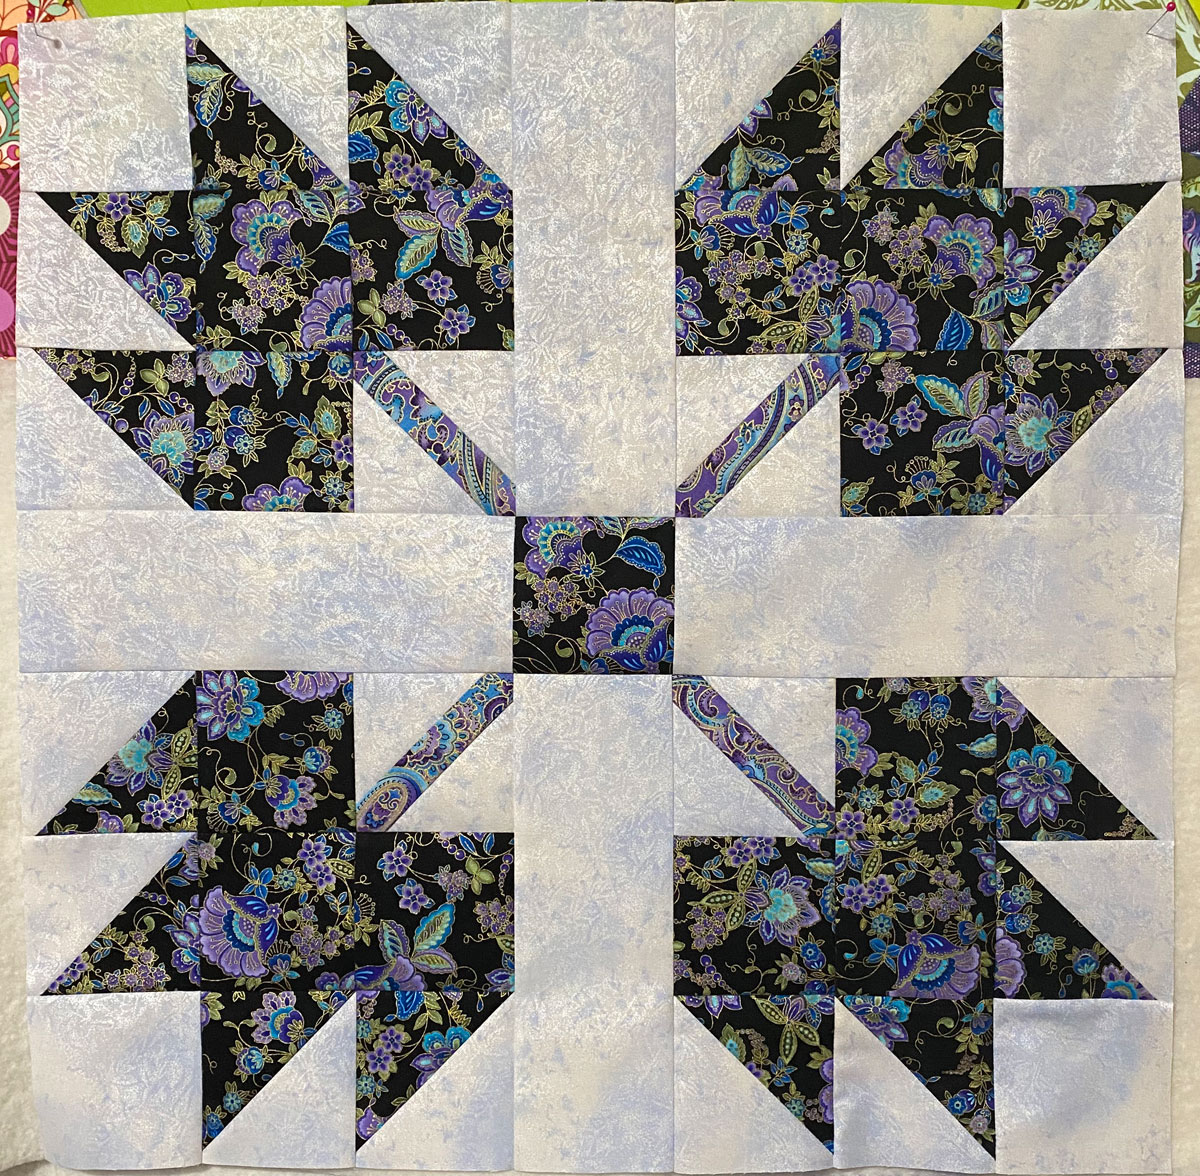
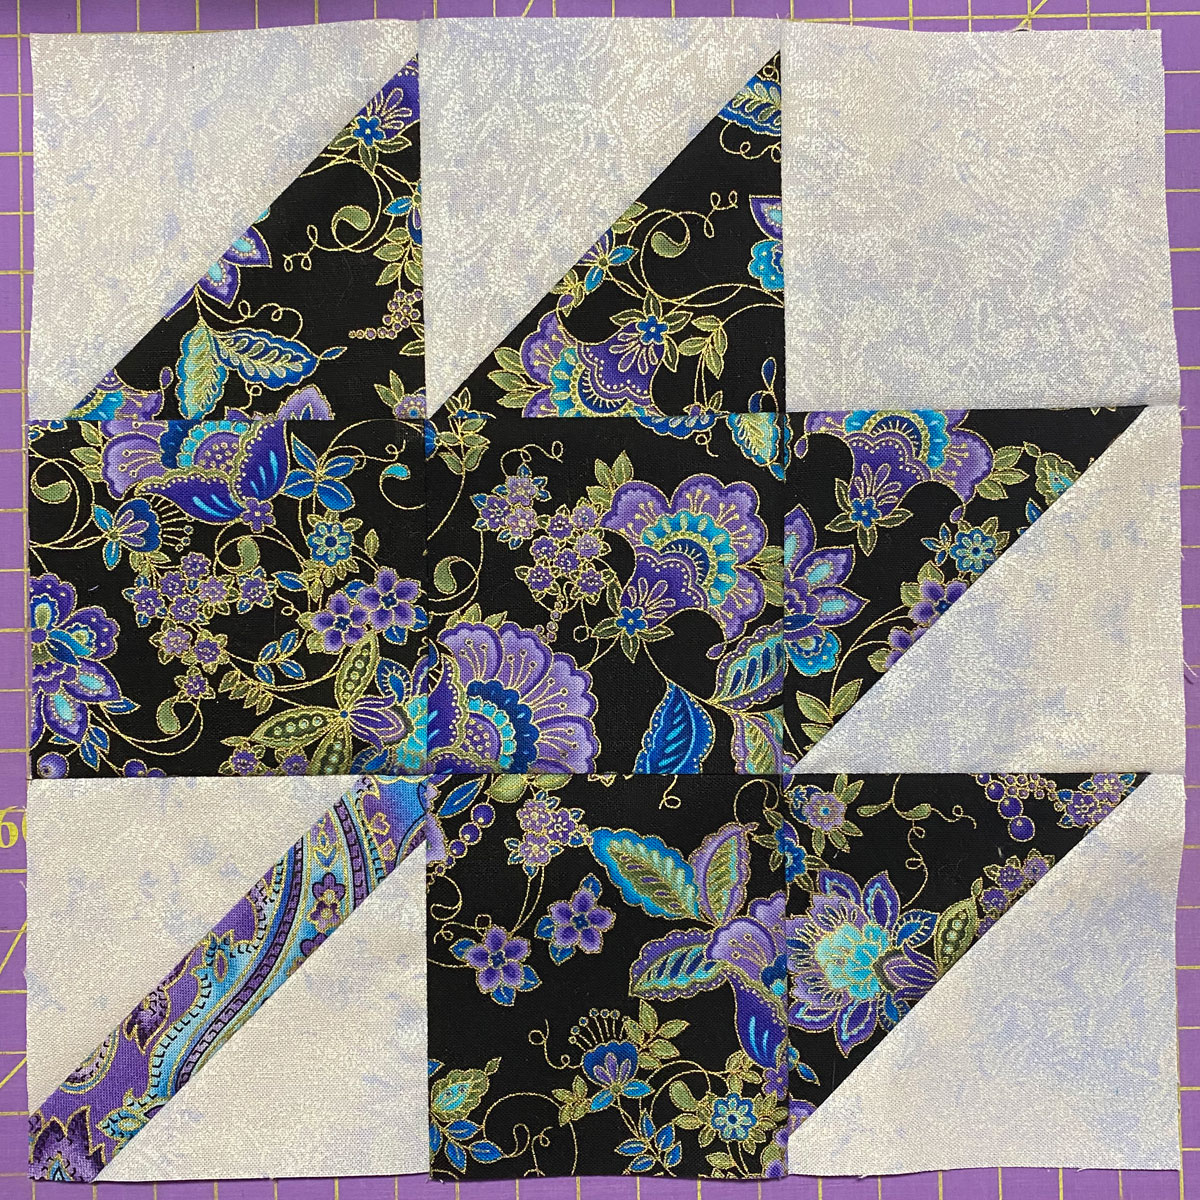
This block is similar to the first block I made. It finishes at the same size as well.
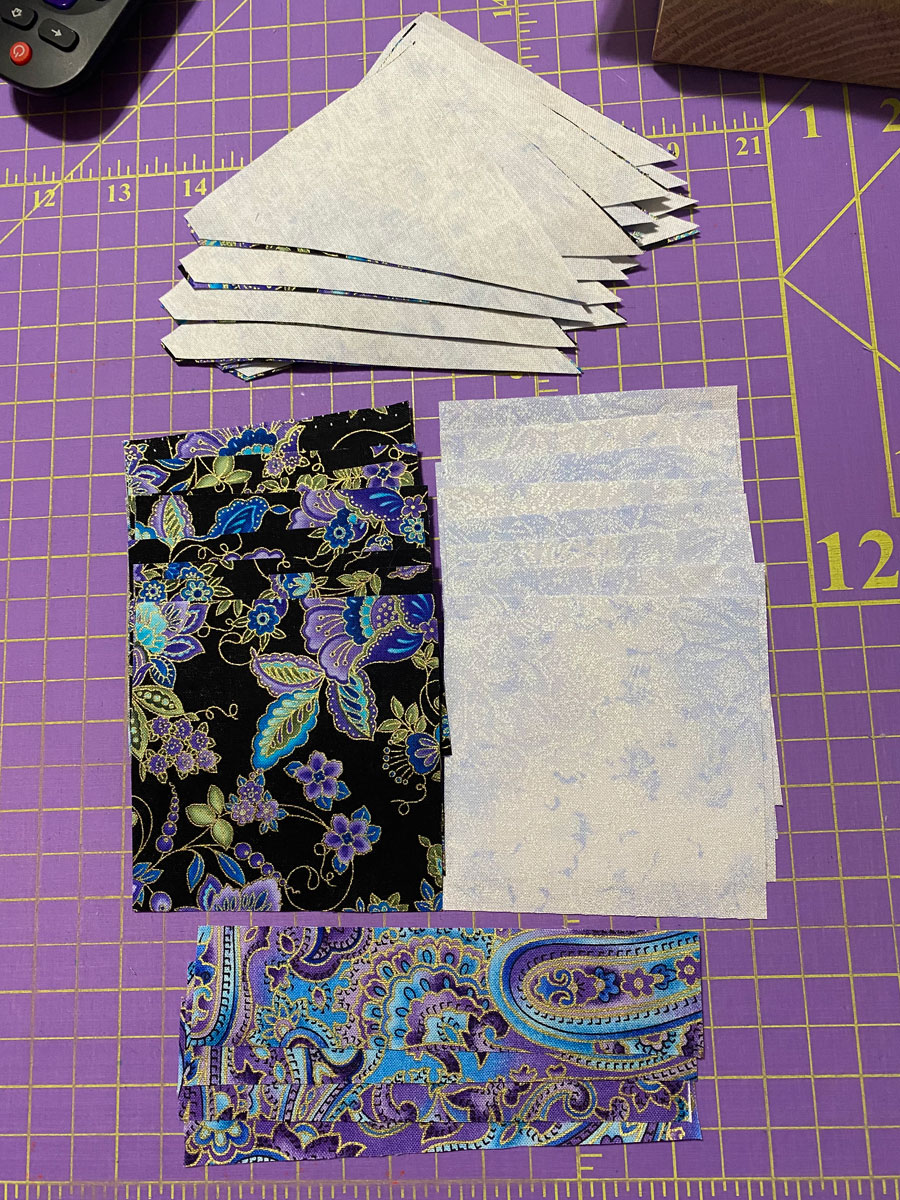
I cut more 3½ inches by width of fabric (WOF) strips: 2 of the background and 2 of the fabric print with the most contrast to the background. I also used the remainders of the strips leftover from the first block (but not my 13 background 3½ inch strips).
From those I cut:
- 4- 3½ inch by 9½ inch rectangles background fabric
- 16- 3½ inch half square triangle pairs (using my Essential Triangle Tool)
- 8- 3½ inch squares background fabric
- 13- 3½ inch squares contrast print
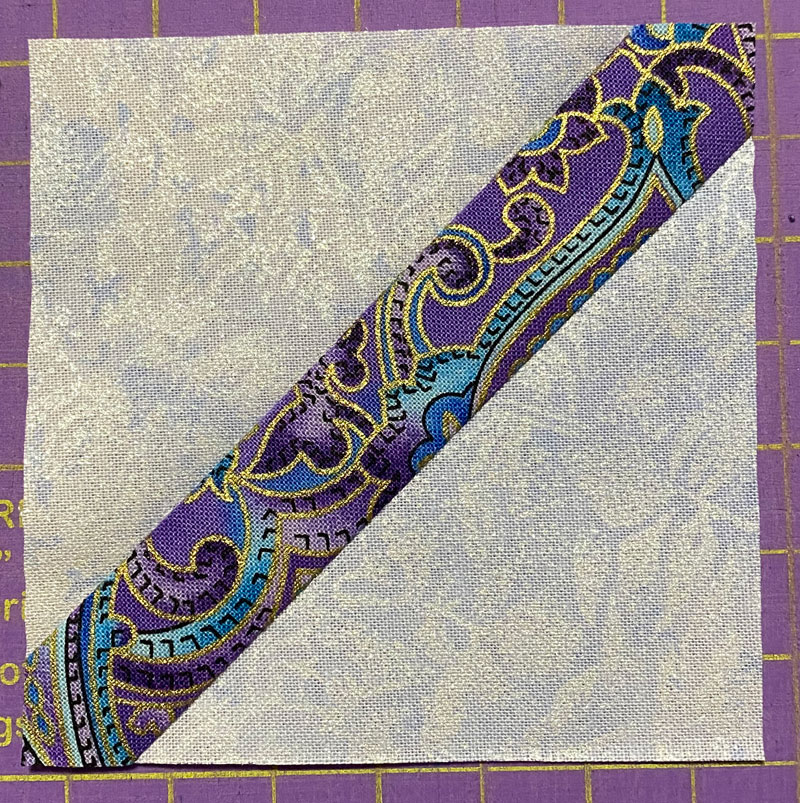
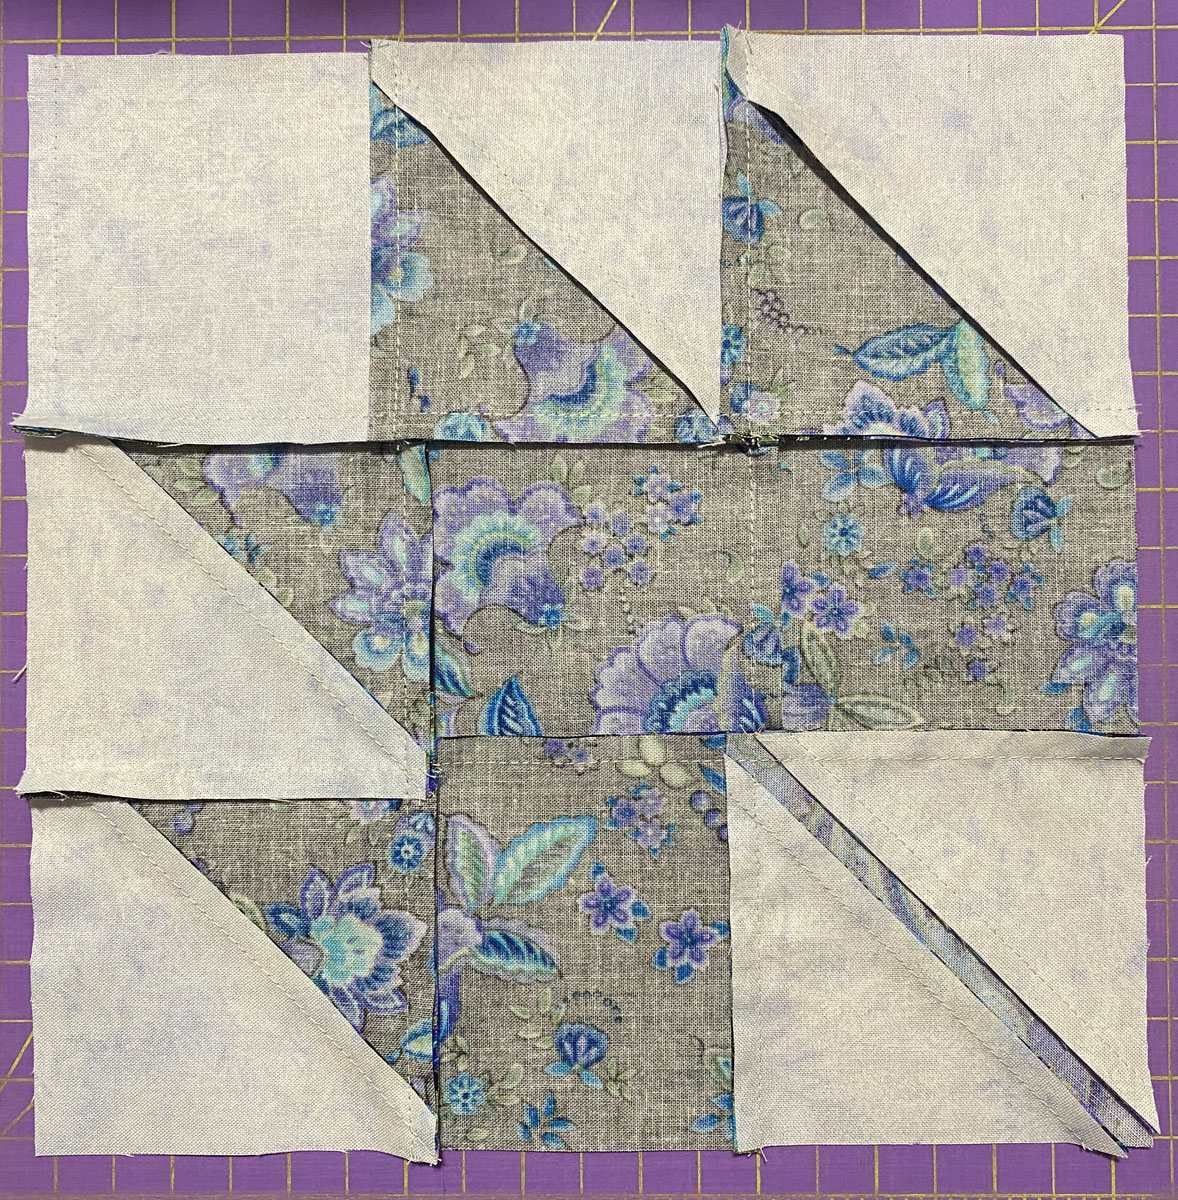
I also cut a 1½ inch strip of my medium print. From that I sub-cut 4 rectangles that measured 1¼ inch by 5½ inches each. Note that I shaved a little bit off that 1½ inches – otherwise my stems would be too wide for my taste.
Four of the background squares I cut in half on the diagonal. I matched those up with the medium rectangles, one triangle on each side.
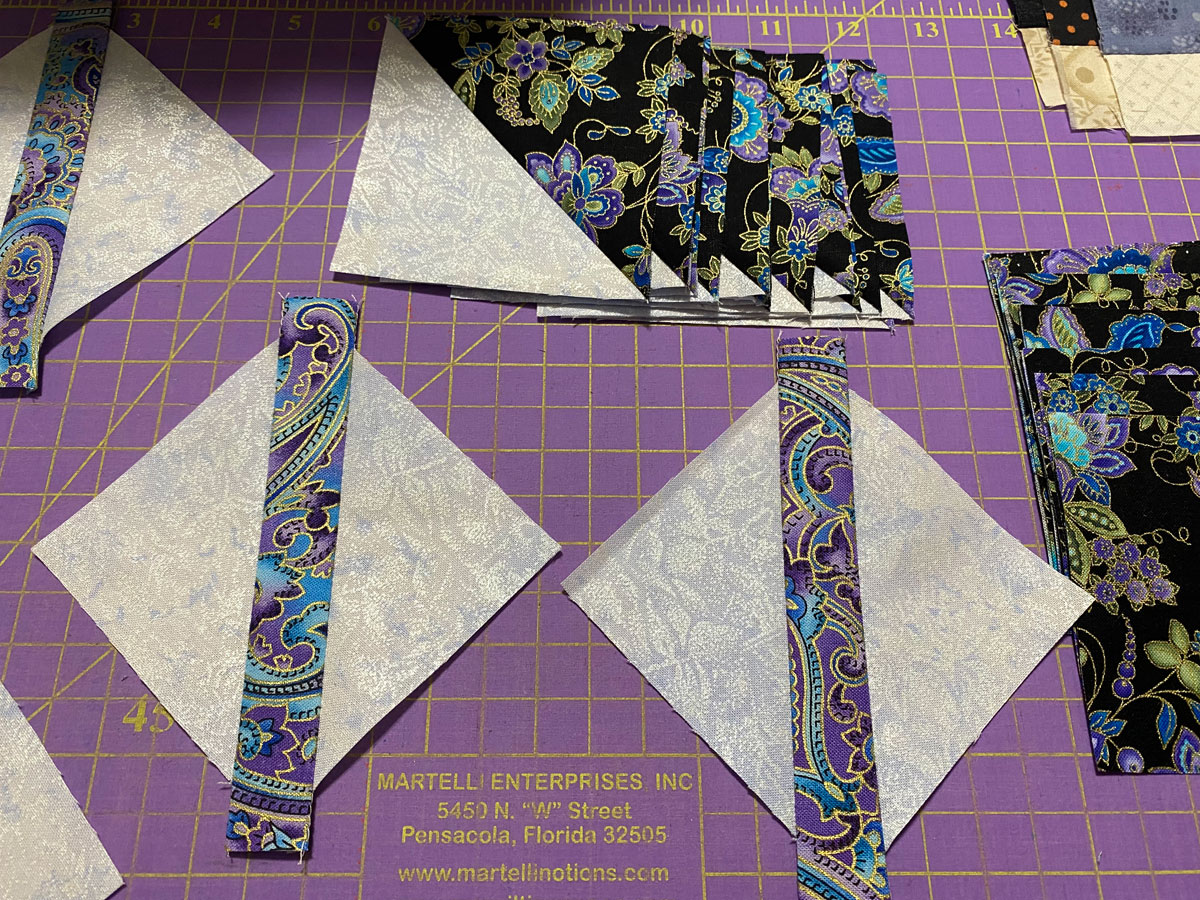
I sewed all of my half square triangle sets together, and then I sewed each of the medium print strips and background triangles. The strips are longer than the triangles on purpose, so I had to “eyeball” center the triangle on the strip. I pressed these toward the strip. Then, I “eyeball” centered the diagonal line of my ruler on my resulting square.
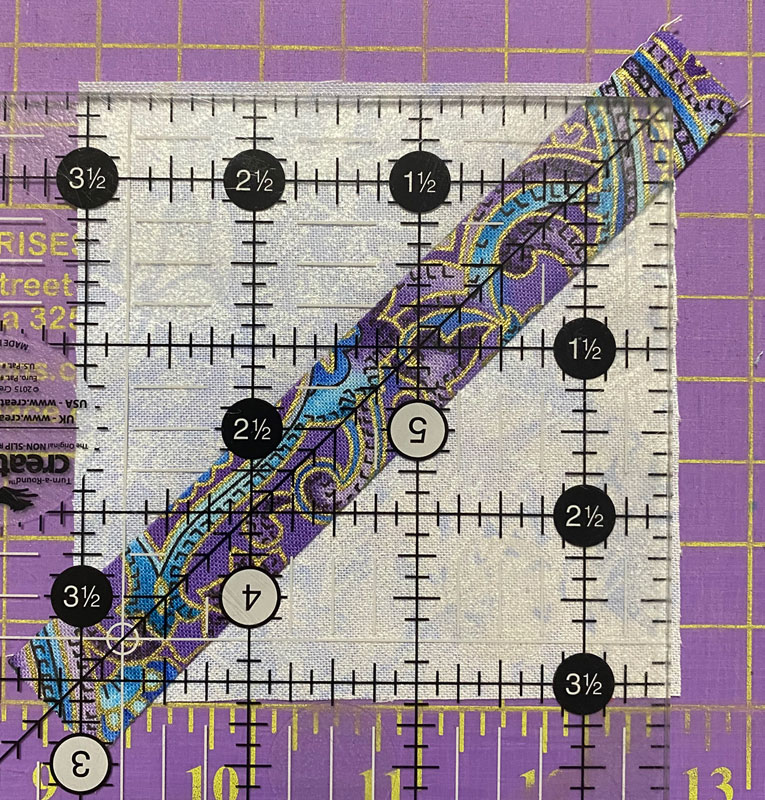
I trimmed two sides, then flipped the unit and trimmed the other two sides to get me back to 3½ inches square.
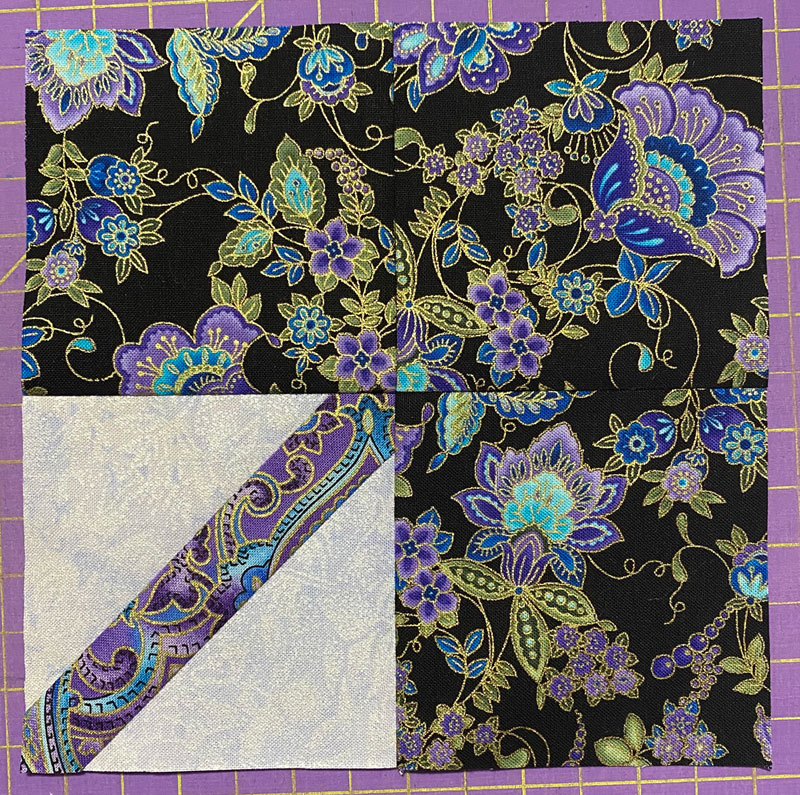
After trimming the dog ears from my half square triangles, everything is ready to put together. I laid out each of the pieces
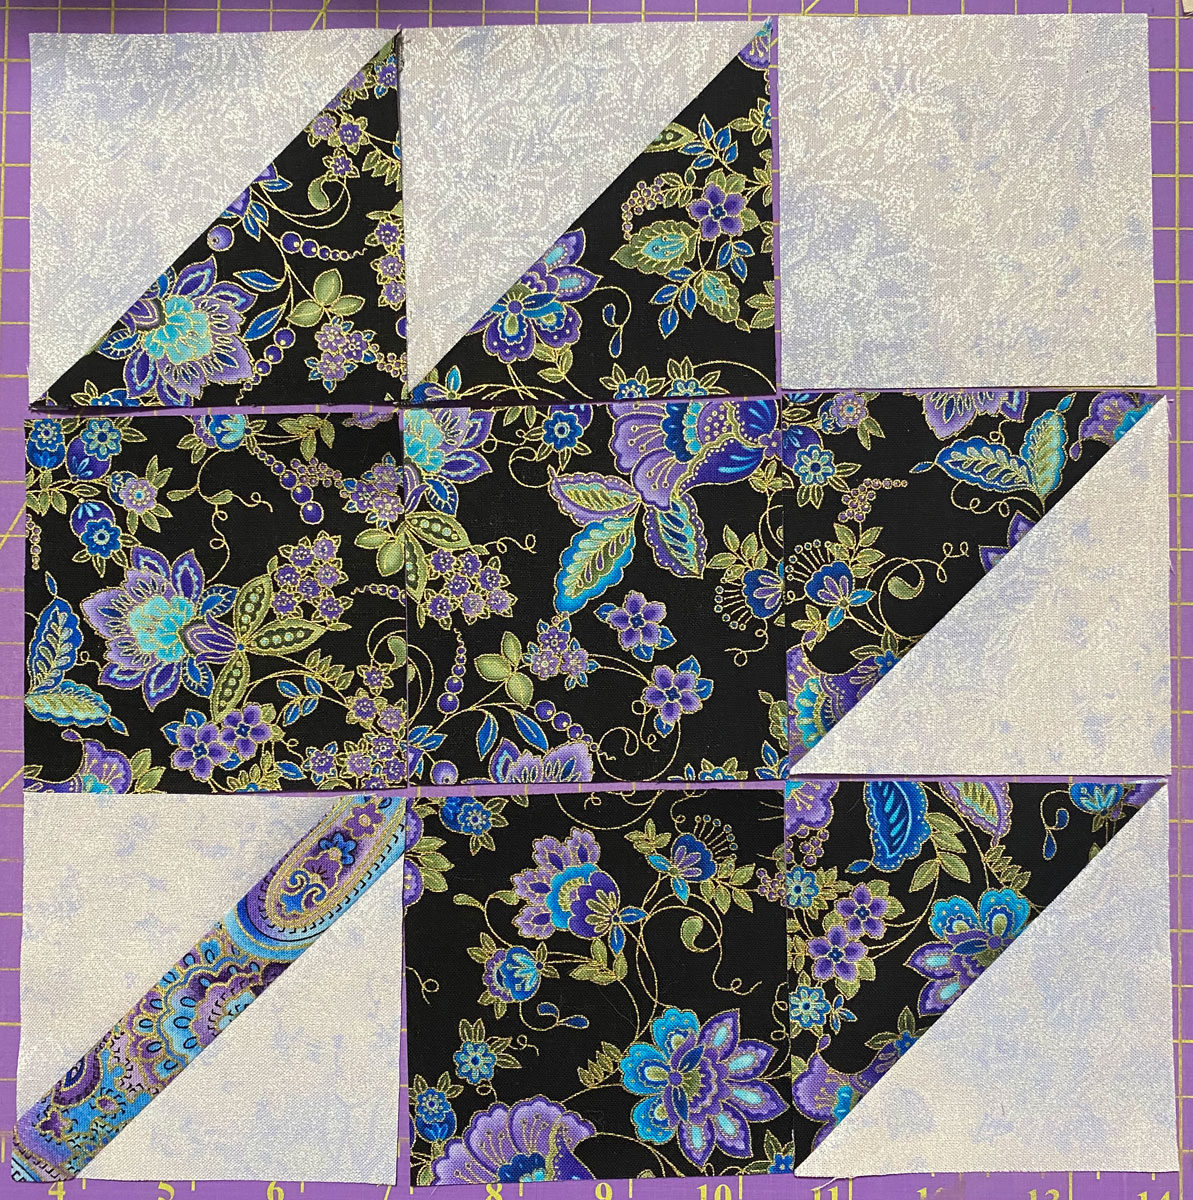
My strategy was to make several “sub-units” instead of piecing this as a regular nine-patch unit.
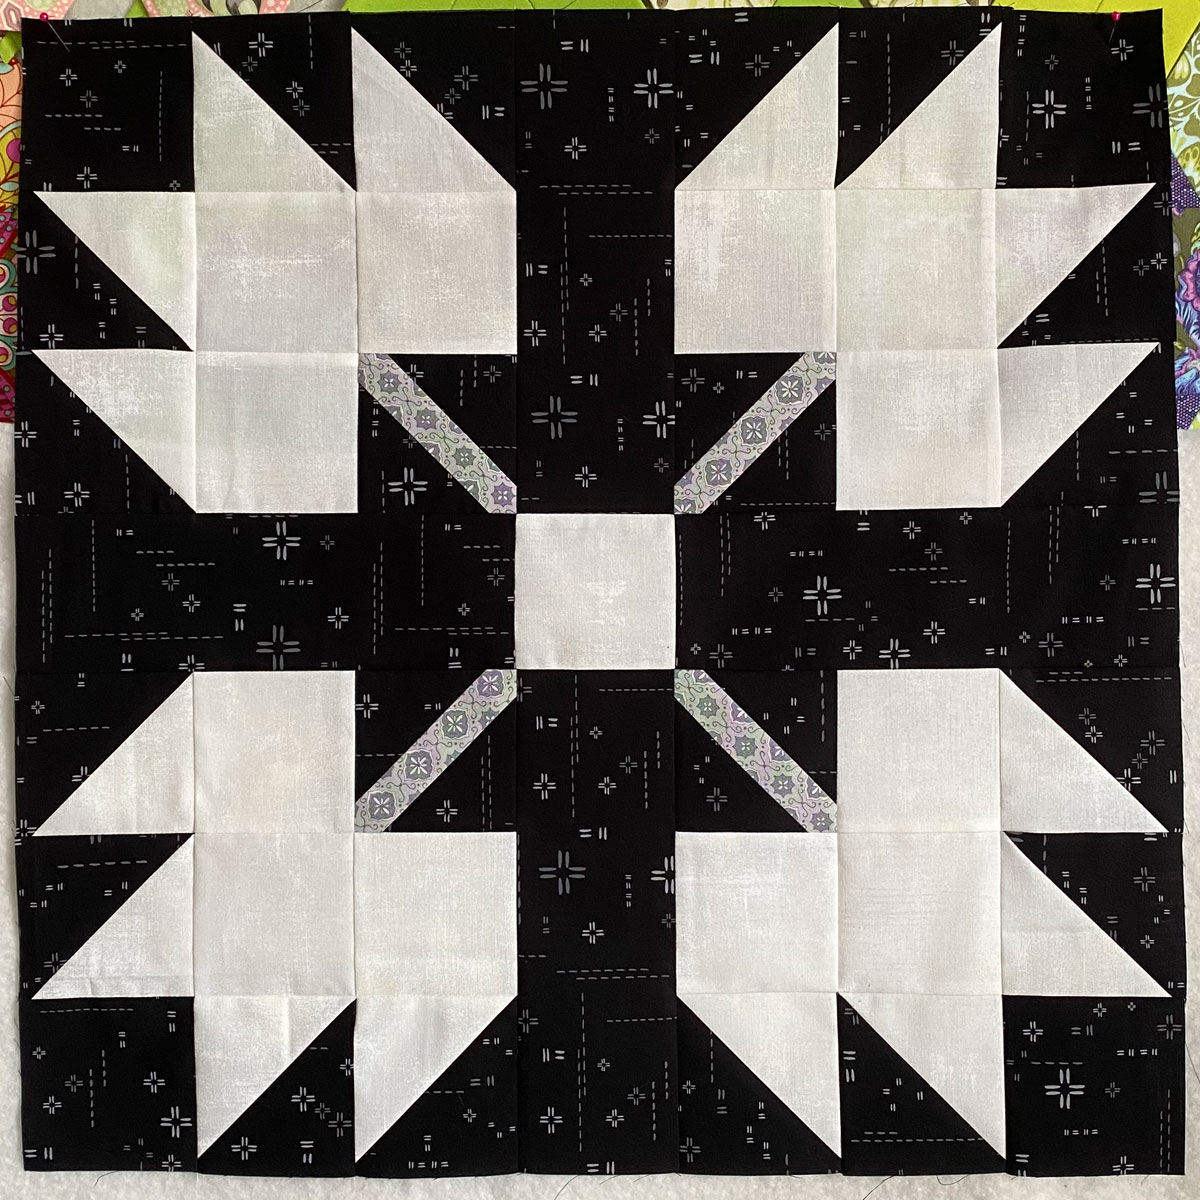
I made a four-patch first from the contrast print and my stem unit.
Then I pieced the top triangles together and the side triangles together. I also went ahead and added the top background square, pressing toward it.
Then, I pieced the two bottom sub-units to each other, and the resulting top and bottom units together.
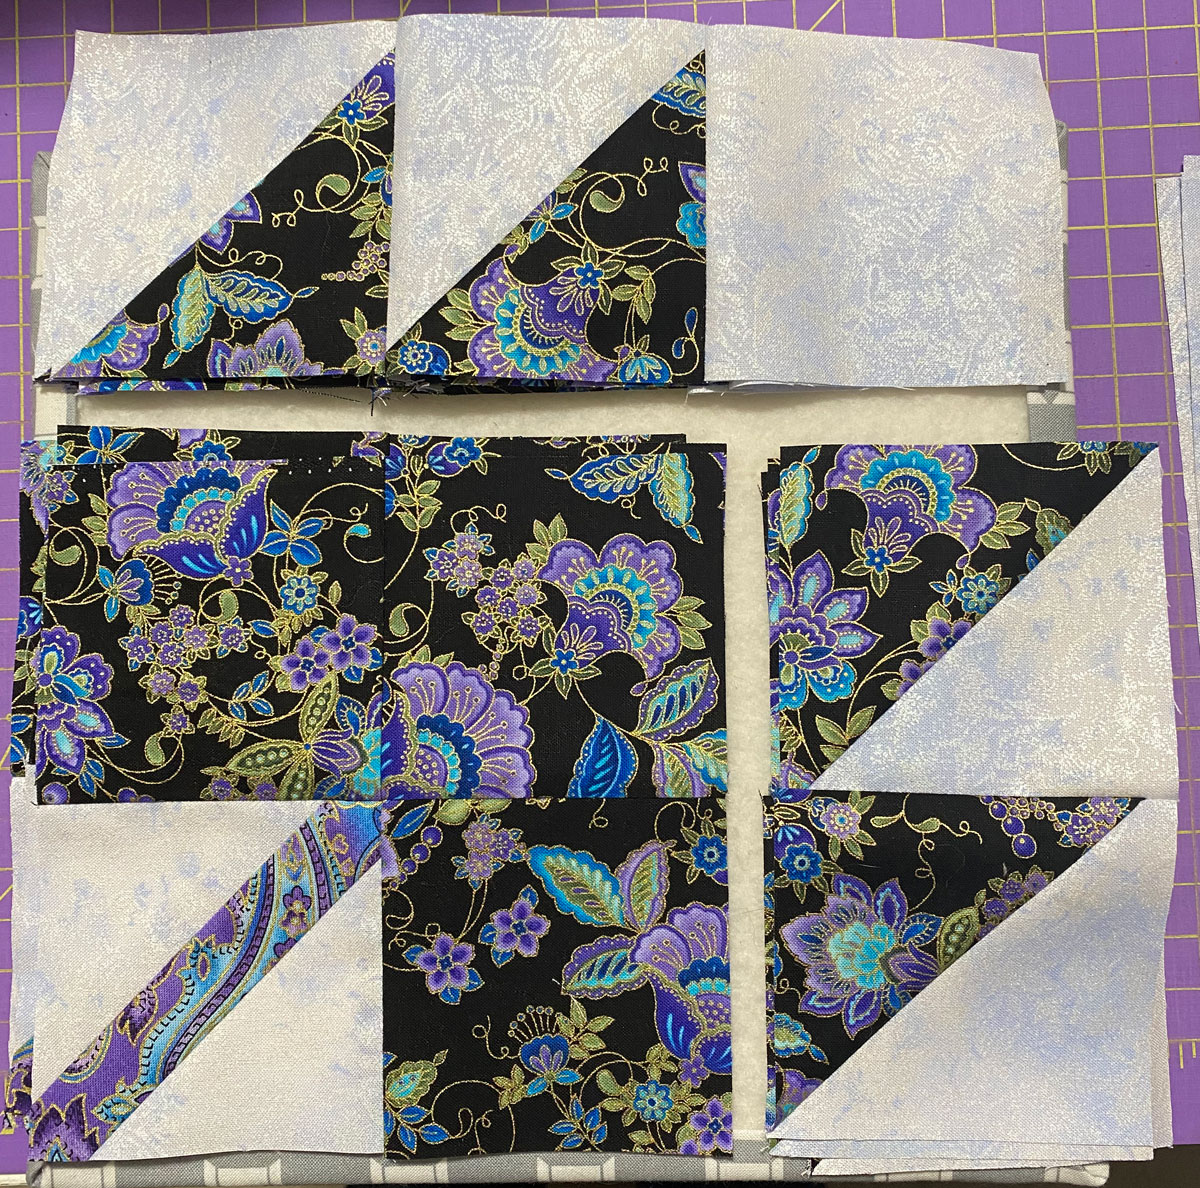
Here’s a look at the back to show how I pressed each seam. I tried to reduce bulk as much as possible.
I made four of these “maple leaf” units, and then proceeded just like I did with the bear paws block, sewing it together as a big nine-patch.
And the black-background version is pretty striking, though I almost wish I had used a busier print (the white is a Grunge).
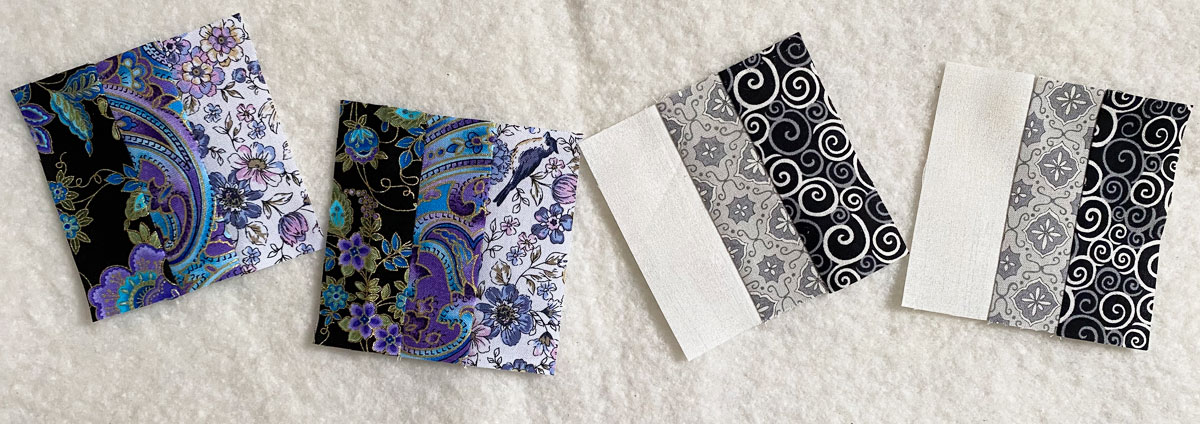
For this part, I decided to do one more thing – I had 1½ inch strips from two of my main fabrics, and I cut a 1½ inch strip from the remaining print that I haven’t used yet.
I sub-cut 2– 3½ inch units from each print and lined them up in order from darkest to lightest.
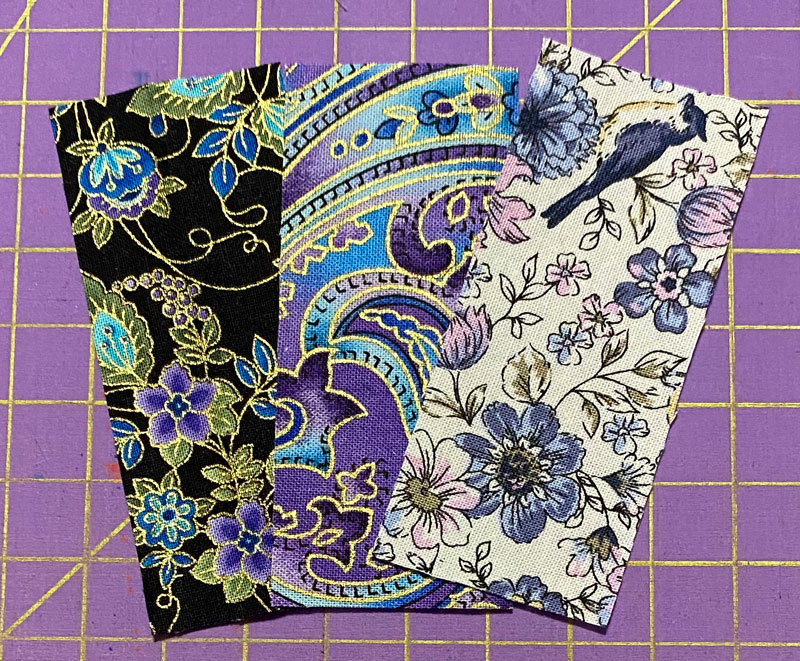
And sewed them together, twice, to make 2- 3½ inch blocks.
I’ve now made the largest and the smallest blocks in this quilt!